Today, we mounted the new LED Dome to our microscope.
Our old array was mounted directly to the microscope stage, which made centering the sample over our objective lens inconvenient. We had to move samples into place by hand because using the stage controls to move samples also caused the LEDs to move and become uncentered.
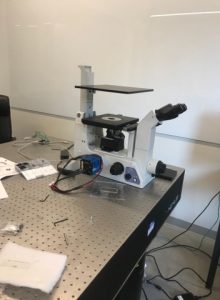
In mounting our new array, we were careful to uncouple the LED array and the stage. We did this by reattaching the microscope’s condenser arm. This is the vertical piece that supported the microscope’s original illuminator lamp. First, we removed all of the old illuminating elements from the condenser to isolate the vertical condenser arm. Then we used a custom-made L-bracket to mount the optical breadboard plate parallel to the objective lens.
Our plate assembly is pictured below, with a zoomed in view of the L-bracket on the left and a view of the entire microscope, with the plate fixed to the condenser arm, on the right.
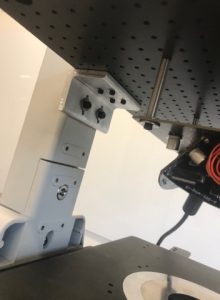
We made our L-bracket piece in the machine shop with help from J. Johnson, the machine shop supervisor. He helped us measure the space between screws and determine what diameter of screw was appropriate for each hole. He showed us how to drill holes of appropriate distance and size.

We used metal rods about 1 inch long to suspend the LED dome beneath the plate.
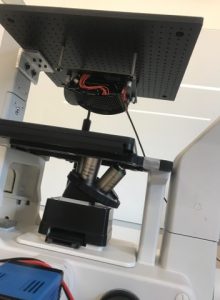
We adjusted the tightness of the screws until the assembly was level. Then we rewired the LED dome and tested some software written yesterday, which divides the brightfield LEDs into a fixed number of random patterns and displays them in turns. This test was successful.